


speedy-seeds.co.uk
Bleeding Heat Plant (Dicentra Spectabilis) | 10+ seeds
Couldn't load pickup availability
Please find for sale 10+ fresh seeds of the Bleeding Heat Plant. This plant is now called Lamprocapnos Spectabilis but is still widely known by its old name - Dicentra Spectabilis. Ever popular hardy perennial due to its profusion of perfectly heart shaped pink flowers. Looks great in the border or in pots and containers.
These seeds are frustratingly expensive and have to be sourced from a specialist - I grow these myself and whilst you get a profusion of flowers, it is hard to get any viable seeds.
INSTRUCTIONS - TO SAVE PAPER I NO LONGER SEND OUT WRITTEN INSTRUCTIONS TO CUSTOMERS. INSTRUCTIONS ARE BELOW SO PLEASE BOOKMARK THIS PAGE. FEEL FREE TO MESSAGE ME WITH ANY GROWING QUESTIONS.
Germination Guide
- The seeds require around 4 weeks of cold stratification
- Soak seeds in water for 24 hours
- Place seeds in a small bag of slightly damp sterile substrate eg vermiculite and keep in fridge for 4 weeks
- Spread the seeds & substrate on the surface of a small pot of damp compost
- Lightly cover with around 0.5cm of vermiculite or similar
- Place bag loosely over pot and keep in a sunny indoor spot where temperature of 15-20c can be maintained
- Ensure doe not dry out
- Germination can take up to 1 month
- Take care when potting on - these plants dislike root disturbance
- Plant out once there is no risk of frost
Olly's General Guide to Seed Sowing!
I love sowing seeds and it runs in the family - dad, granddad and finally my great-granddad for whom the hobby helped him get over his experiences in the Great War. I still get a big kick when I see the first seedling poking through from a new plant that I have never sown before or been successful at. However, even the most experienced gardeners draw "blanks" from time to time. Whilst I sow all the seeds that I sell so I know that they are viable, some are trickier than others and problems can arise so here are some tips to make "blanks" few and far between:
1) Don't Rush! Tempting though it is when that packet arrives in the post to simply bung the seeds in some compost!
2) Google and YouTube are your friends! Take some time so see the methods other people use to germinate the seed.
3) Think Nature! What conditions do seeds face? For example a seed from a tropical plant will fall to the warm, wet and dark jungle floor. A seed from the mountains of Europe will fall to the floor in Autumn, then have to endure months of freezing temperatures before germinating in the spring. So as growers, what we are trying to do is to simulate the conditions that the seeds will naturally experience and there are plenty of tricks that can be done to short cut the processes somewhat.
4) Good compost pays dividends . The best investment you can make is to purchase three bags - one of potting compost, one of vermiculite and one of horticultural sand. With these three bags I can make up whatever soil type a particular seed likes (although for most seeds I find a 50/50 mix of compost and vermiculite works just fine)
6) Rot is your enemy. The single biggest danger to seed germination is rot - either before germination or after "damping off" when the seeds germinate. To reduce the risk, ensure you have good free draining soil mix and that it is moist but not wet. The best investment you will make is a bottle of (very cheap) 4% hydrogen peroxide (mixed with water 1:4) - this disinfects and also encourages germination. Unless the seed variety absolutely requires it I prefer NOT to cover my seeds trays with plastic bags, Whilst germination is often faster this way, it greatly increases the risk of rot. I prefer to place my seed trans inside a watertight plastic tray and water from the bottom - airflow over the surface reduces the risk. The surface is kept moist as required by spraying with my water/peroxide mix (see above)
Problem? Don't rush to Feedback - get in touch and I will sort it out!
Materials
Materials
Shipping & Returns
Shipping & Returns
Dimensions
Dimensions
Care Instructions
Care Instructions
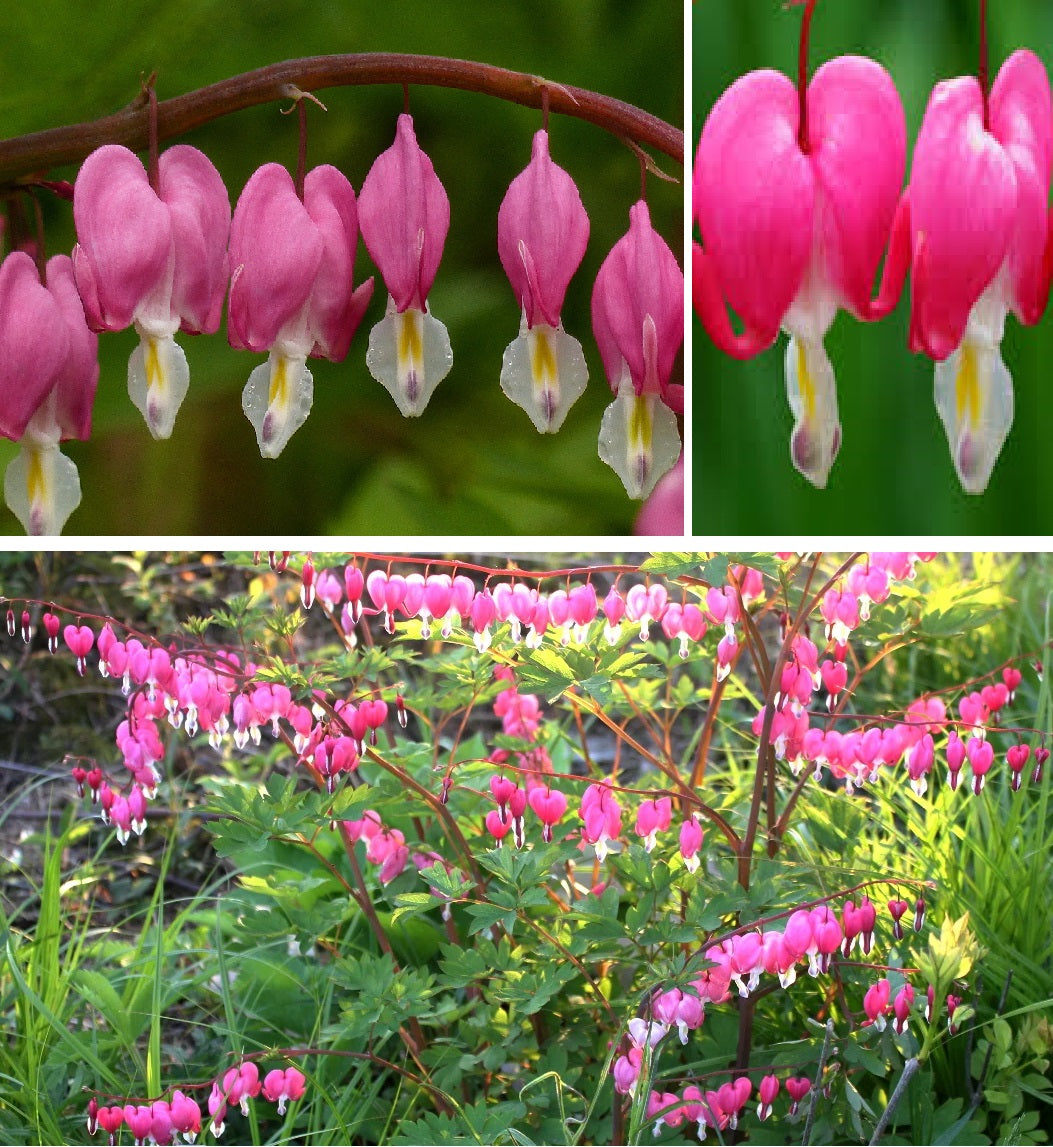
Image with text
Pair text with an image to focus on your chosen product, collection, or blog post. Add details on availability, style, or even provide a review.
-
Free Shipping
Pair text with an image to focus on your chosen product, collection, or blog post. Add details on availability, style, or even provide a review.
-
Hassle-Free Exchanges
Pair text with an image to focus on your chosen product, collection, or blog post. Add details on availability, style, or even provide a review.